1)
Download Hammer Valve Editor ( downloaded 478 times)
2)
Download Cs_expert-tom ( downloaded 494 times)
Now, we have the programs. Install Valve Hammer Editor and unpack cs_expert-tom793.zip.
The
cs_expert-tom793b.fgd file with the
sprites folder will be copied in C:Program FilesHammer ( that's an example. You have to copy the files in the folder where you have installed hammer)
Configure Valve Hammer Editor
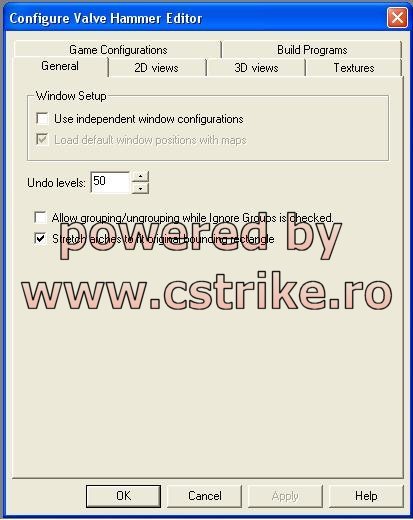
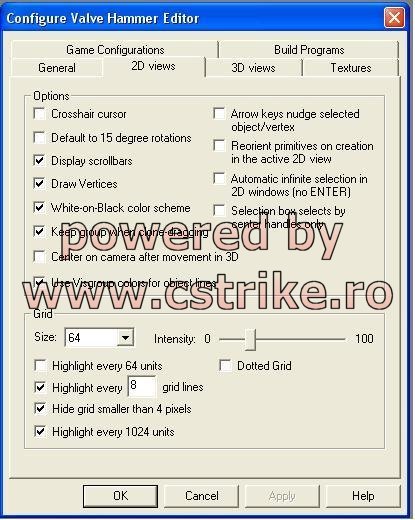
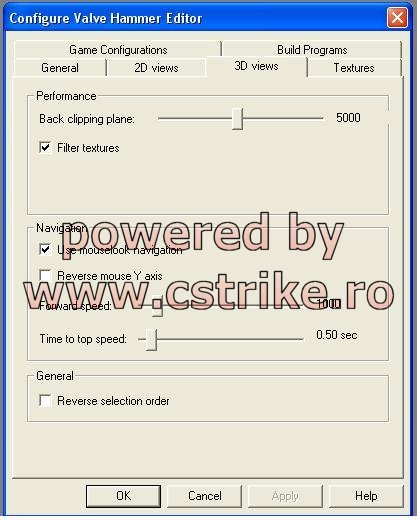
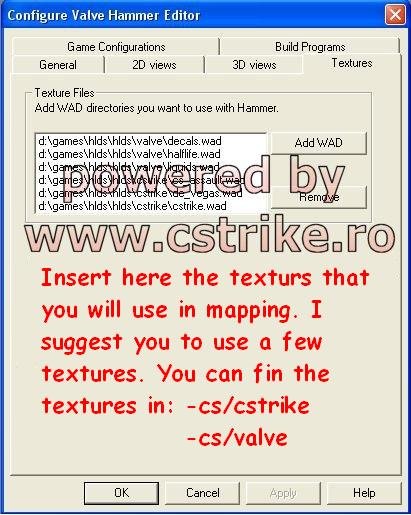
Start Hammer Editor and select TOOLS -> OPTIONS Than configure hammer like this:
General »
Click to see screenshot
2D views »
Click to see screenshot
3D views »
Click to see screenshot
Textures »
Click to see screenshot
Game Configurations »
Click to see screenshot ( Warning! The RMF DIRECTORY folder must not be the same folder with place compiled maps directory from build programs )
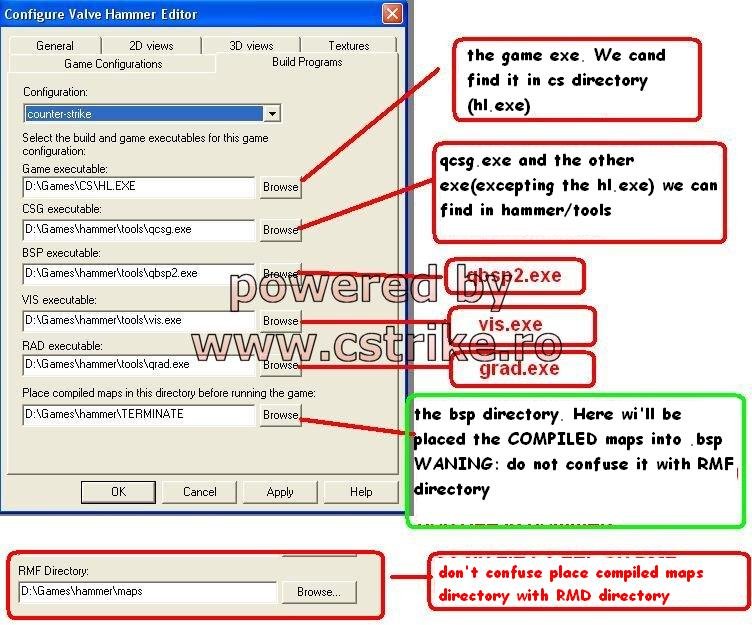
Build Programs »
Click to see screenshot ( Warning! Rhe compiled maps directory from build programs must not be the same folder with RMF DIRECTORY folder place )
Click to see screenshot
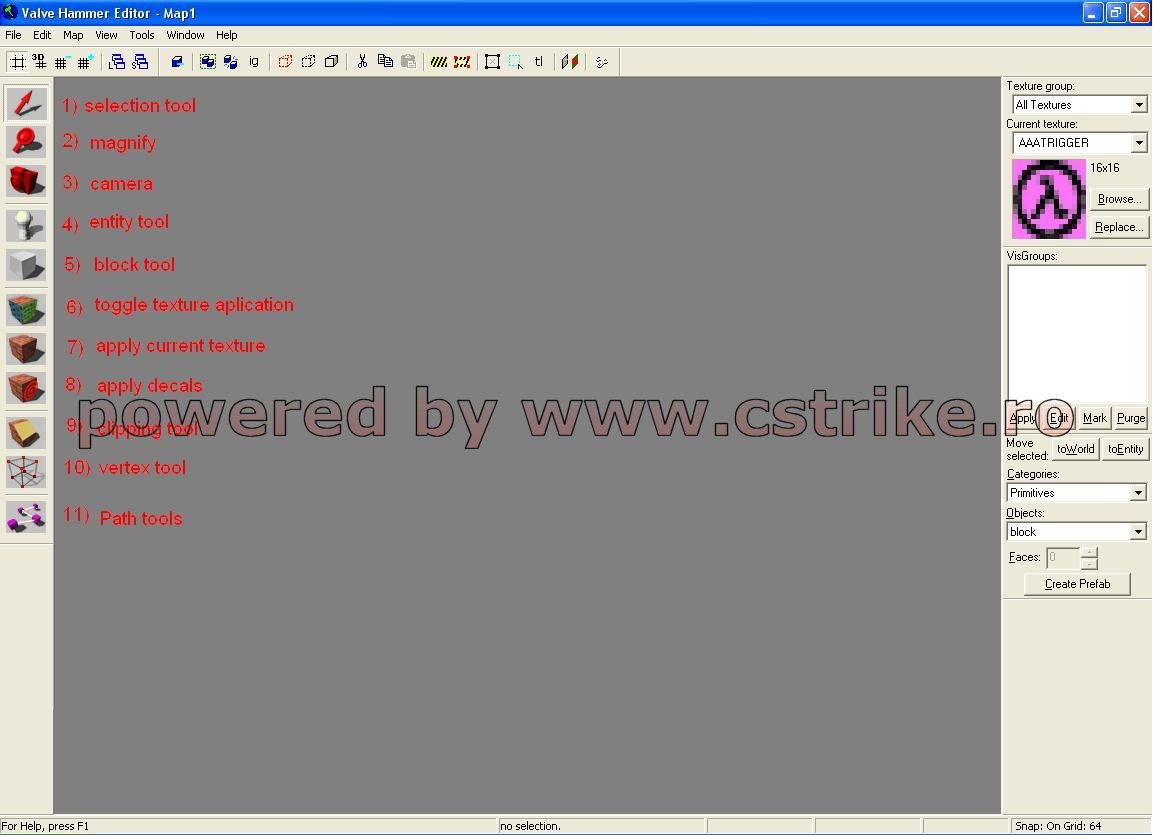
Now, after the configuration, let's see the tool box :
1)
Selection tool : with this tool, tou can select "brushes" and "enitiys". A selected object appear with the red color.
2)
Zoom tool : with this tool you can zoom in/zoom out the image. you can make this just scroslling the mouse scroll button
3)
Camera tool : with this tools you can wiev inside the map. you can turn arround to see anything.
4)
Entity tool : with this tool you can creat entities[(players (terro/counter), light, armoury entity ].
5)
Brush tool : This is the most important tool. with this, you draw the whole map..
6)
Texture app. Tool : with this tool you can apply textures to the objects
7)
Do not be confused with "Texture App".This will apply textures to the current selected objects
8)
Apply DECALS tools. with this tool you can apply textures on the existent objects, without create a ne one. For example you can apply a window texture on a wall, withouct create a new object
9)
Clipping tool. With this tools you can cut some walls.
10)
Is not important
11)
Is not important
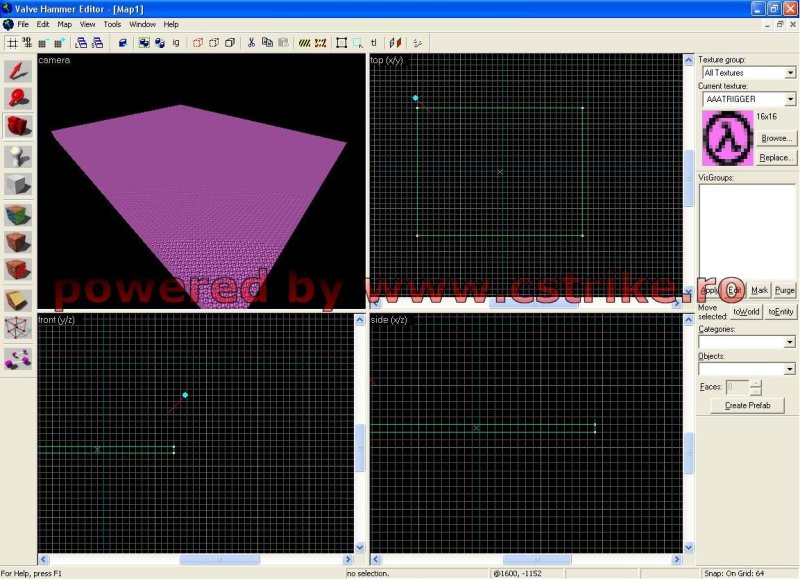
Now let's start creating maps. Go to FILE » new.
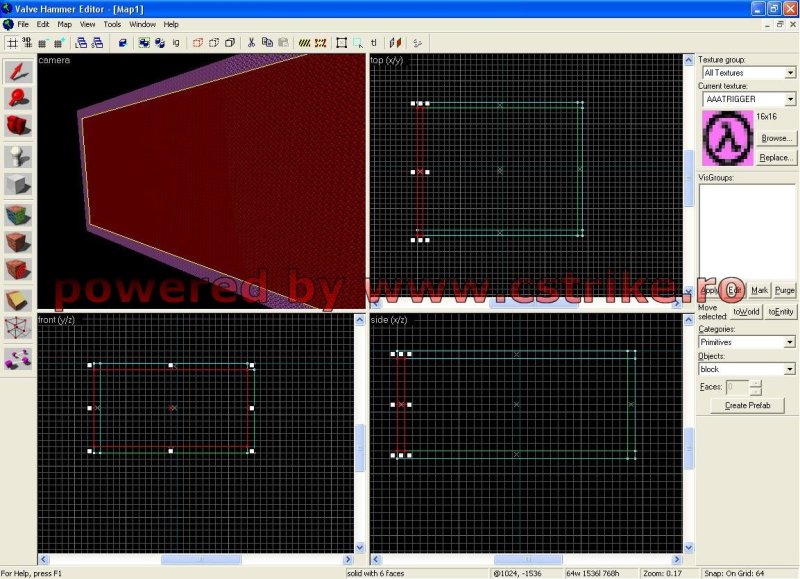
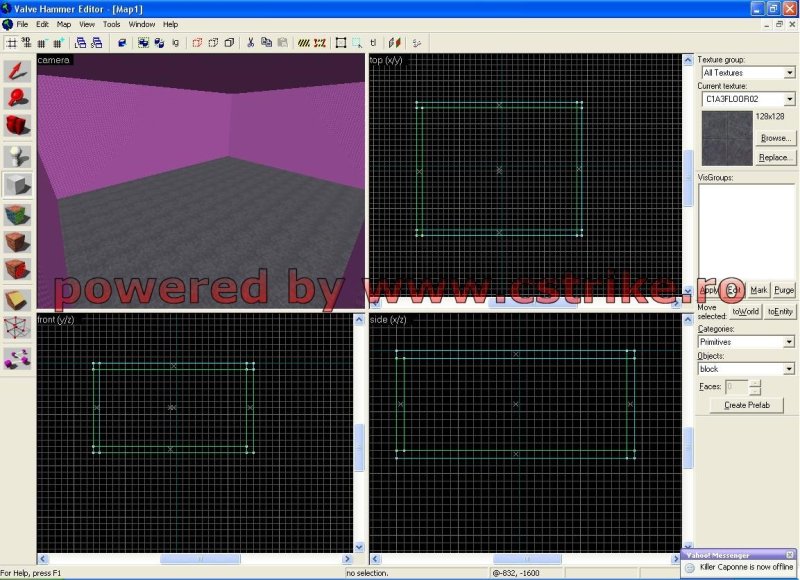
First of all, click on the "brush tool" after that draw a square, in the TOP (x/y) window. will look like this:
Click to see screenshot
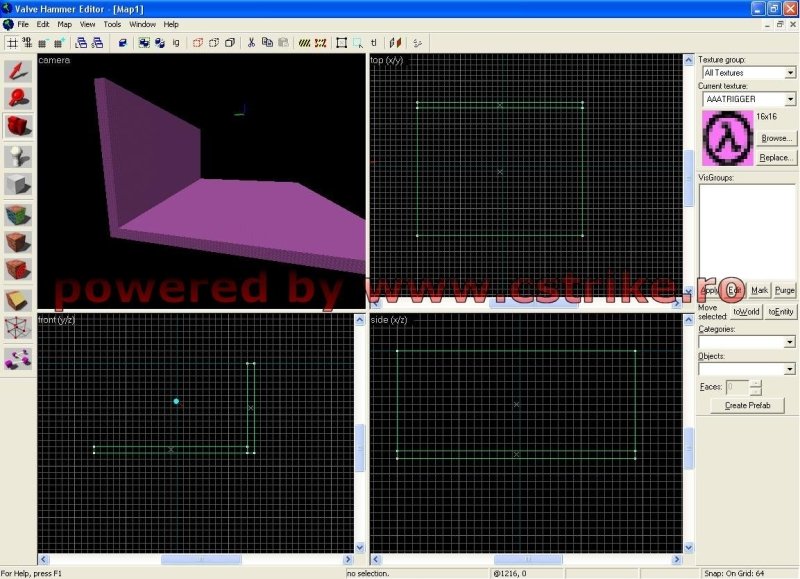
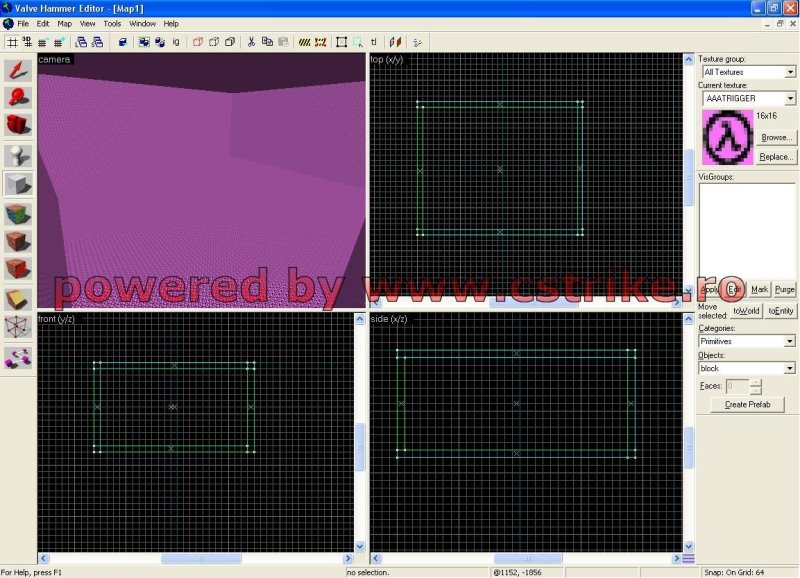
This is the base. Now let's draw the walls and the ceiling:
Click to see screenshot
After this, we will draw the ceiling, in our case the sky:
Click to see screenshot
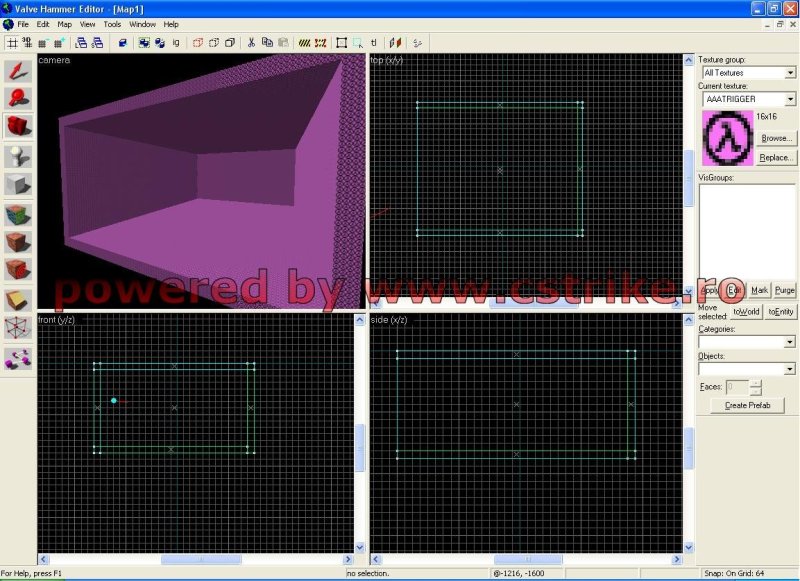
Now we have to close the map with a new wall to have a cube:
Click to see screenshot
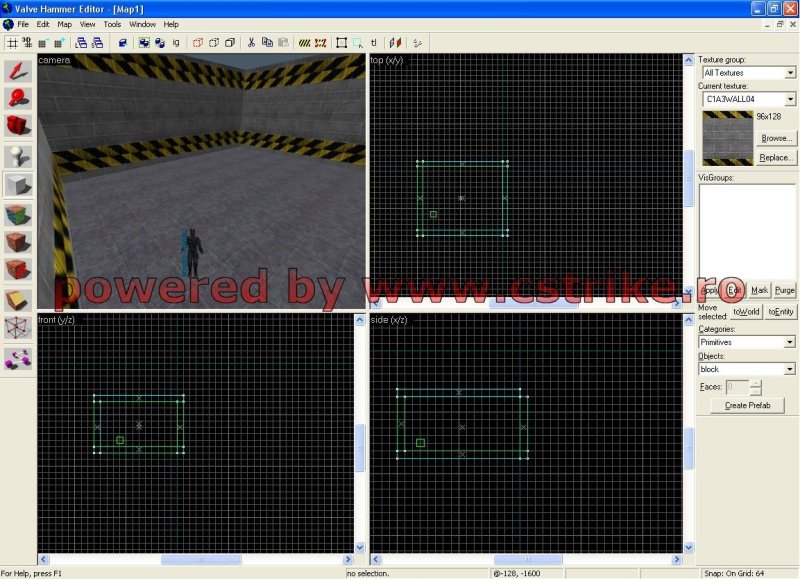
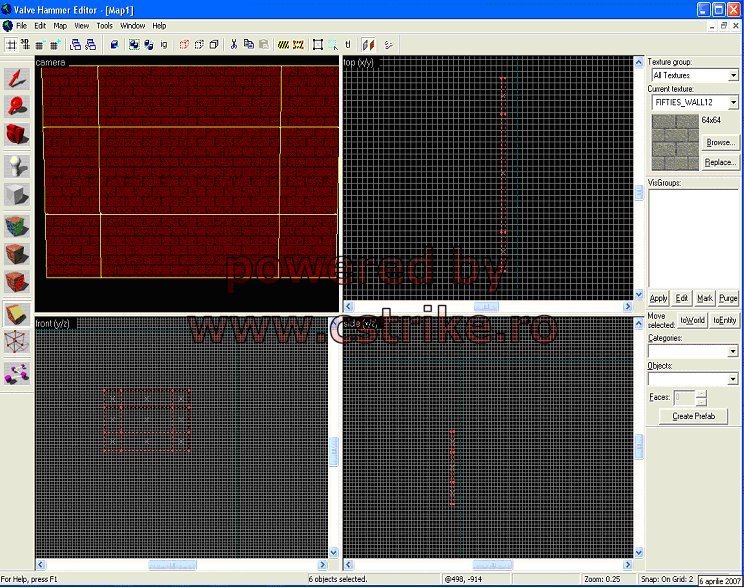
With the camera tool go inside the cube and start to make the map. Will start with the textures:
Click to see screenshot
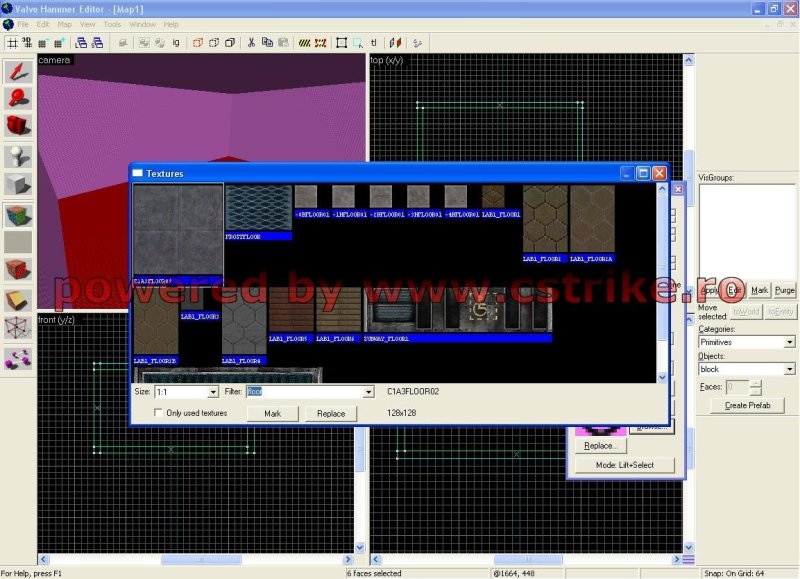
It looks horrible. Let's make it look better. First, with "selection tool" click on a wall, after that press
SHIFT+A to add textures. Click browse. I choose the "
floor" texture for de floor:
Click to see screenshot
Now double-click on the choosen texture, than click APPLY.And look to the result::
Click to see screenshot
After this, make the same thing to the walls and let's go to the "sky". To have sky, apply to the ceiling wall, the SKY texture. Will look like this:
Click to see screenshot
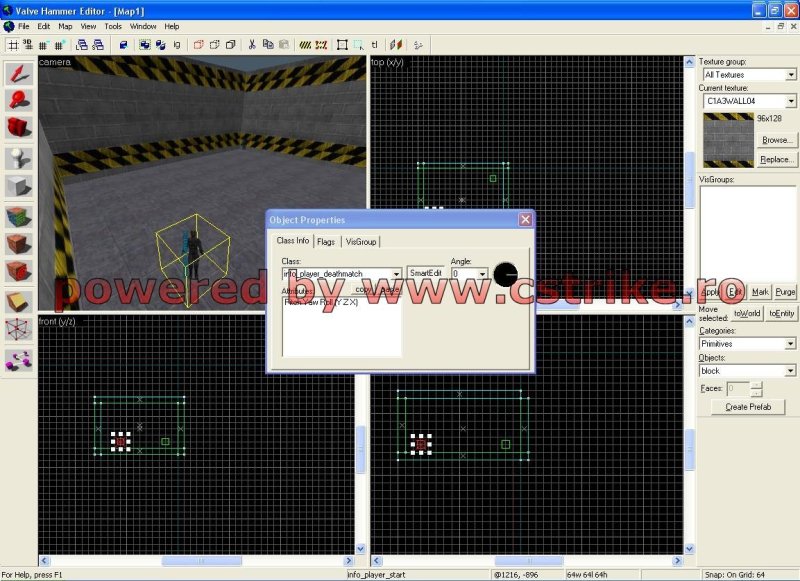
Now, let's apply some entities. We are starting with Humans (players), after that the bulbs and weapons. Select the "ENTITY", go to the top(xy) windows and click, after that press enter. You must look in the SIDE window. That must be above the floor:
Click to see screenshot
Let's create another entity, in the opposite angle of the map, than, double-click on the second ENTITY, and press
ALT+ENTER than select
info_player_deathmatch, to make him
terrorist:
Click to see screenshot
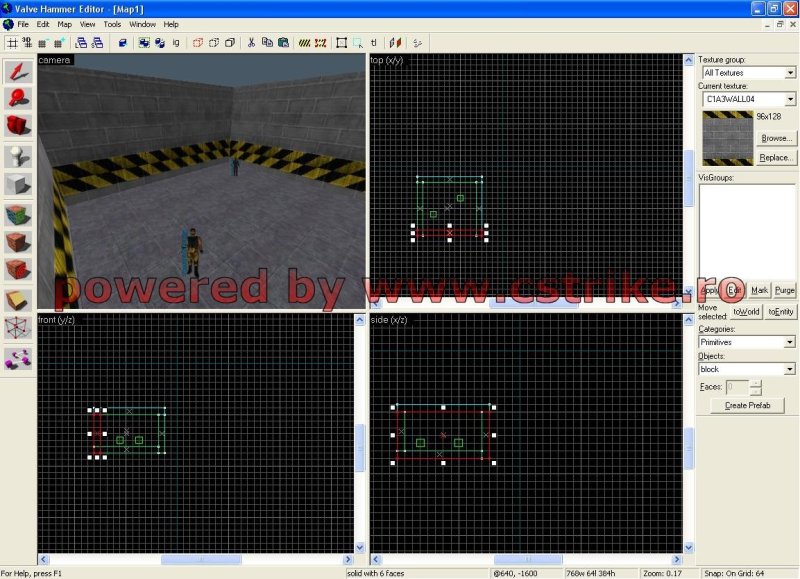
We have players. Now we must apply some bulbs to have light. With the entity tool, create some entities, after that press ALT+ENTER and select "light". Put some bulbs:
Click to see screenshot
We have to apply some Armoury, and our first map is ready. The armoury will be applied with the entity tool, but must be put very very close by the floor. At class, select armoury_entity. :
la count = bullet number
la item = Weapon (name of the weapon)
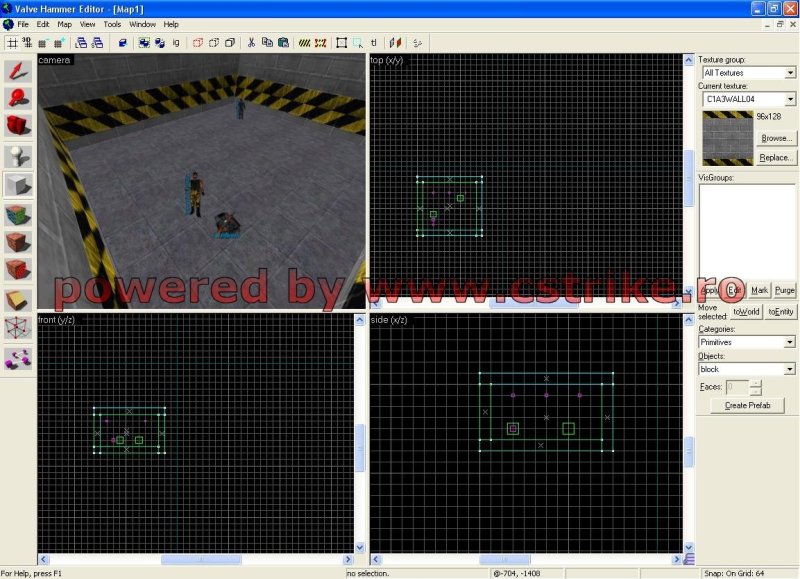
Our map looks like this:
Click to see screenshot
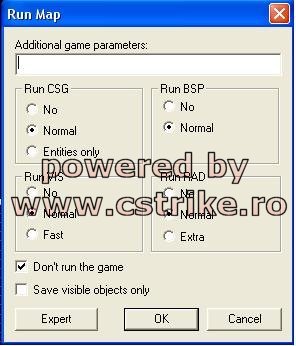
Let's make it in .bsp format. Go to start » run, select OK everywhere and press ok:
Click to see screenshot
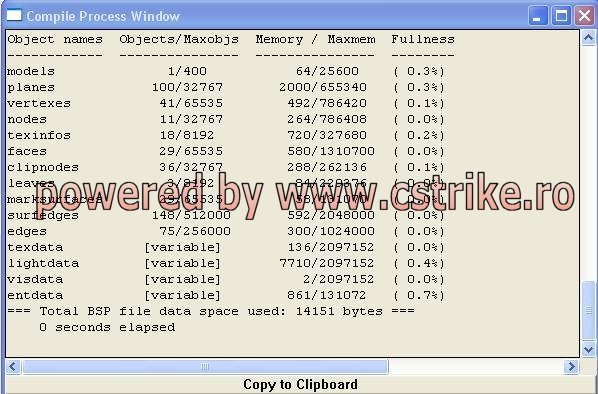
When it's ready, will look like this:
Click to see screenshot
Copy the map from TERMINATE folder( in my configuration) in cstrike/maps and start the game.
Let's make some complcated things. For example, let's create a ladder.
Ladder:
A lot of maps use the ladder to climb throw the walls / buldings. Now we are gonna learn how to creat a ladder.
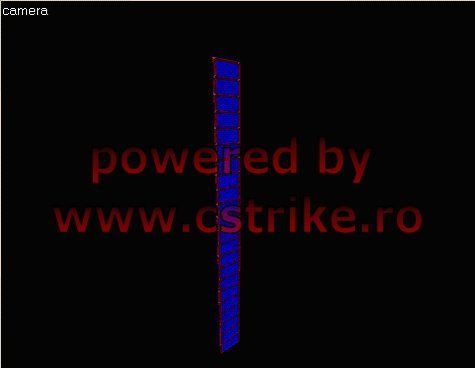
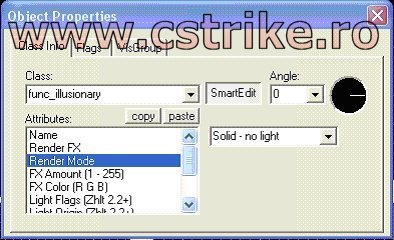
First of all create a block with the "brush". Apply the "ladder" texture , after that press ctrl+t and select func_illusinary. At Render mode select Solid:
Click to see screenshot and
Click to see screenshot
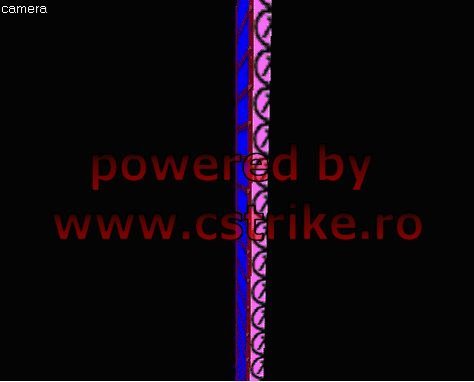
Now we will create the "ladder Engine". Create a block with the same size as the ladder block, and stick it on the ladder block. To this block, we will apply the default texture, AAATRIGGERR ( pink with hal-life logo). After that, select the block, and press ctrl+t si and select func_ladder. This block will be sticked on the climbing face:
Click to see screenshot
How can we cut walls?!
Is the most complicated thing in hammer, but we must try to learn it.
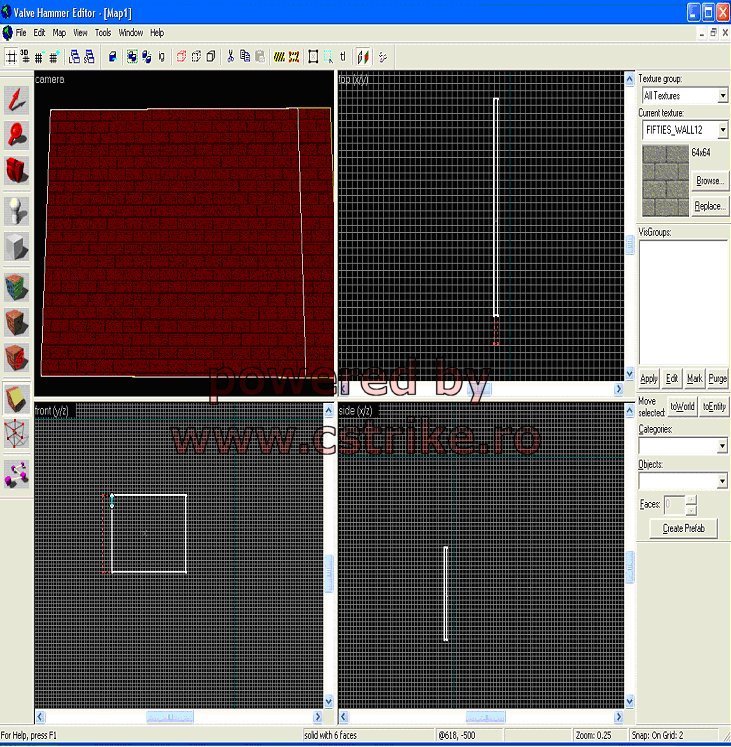
First, create a block with "brush", apply a texture and let's start. With the clipping tool start to cut like this::
» if we wanna cut it, we click 1 time on the clipping tool
» If we want to make a windows in the wall, click 3 times on the clipping tool ( we click after we mark the line. after you draw a line, press ENTER)
Direct cut :
Click to see screenshot
Cut up:
Click to see screenshot
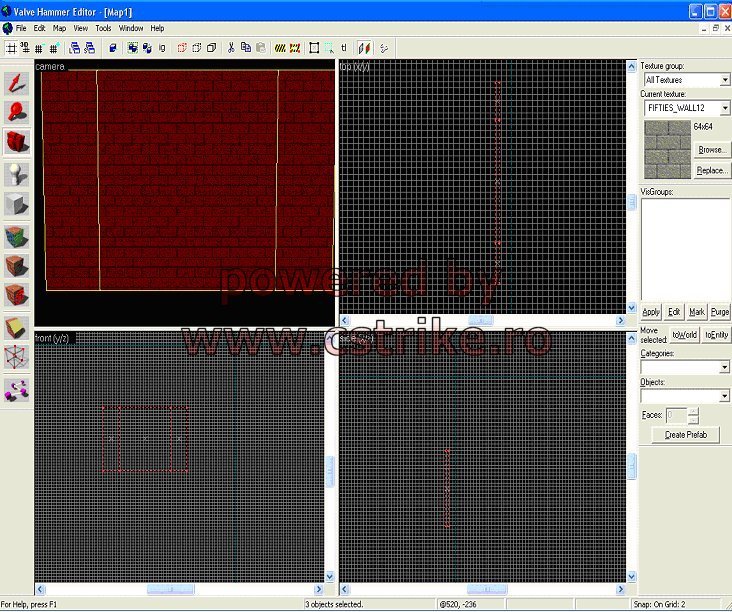
Let's try to learn the "interior cut". So, as you see in the image, we start to draw the first line. Now we have to start drawing the next lines, like in the next images:
Click to see screenshot 1, screenshot 2 and screenshot 3
After this, click on the "middle piece" and pres delete:
Click to see screenshot
Let's create a round wall.
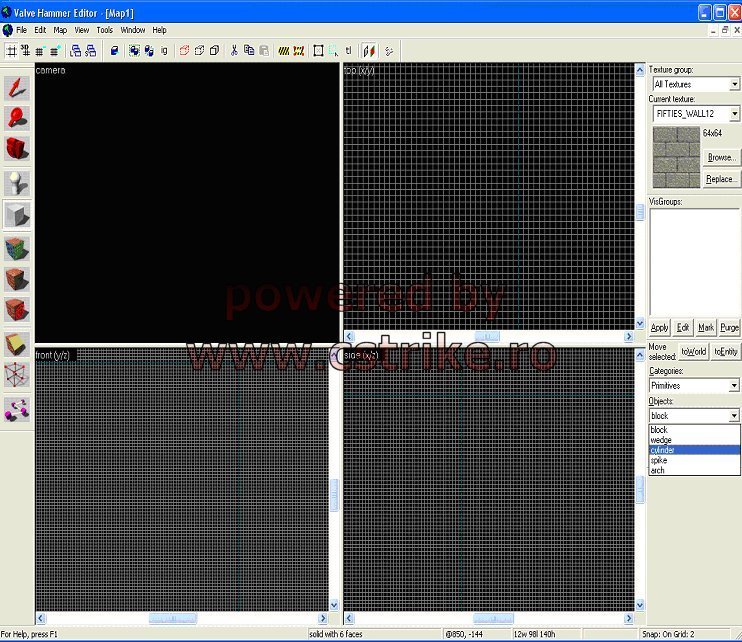
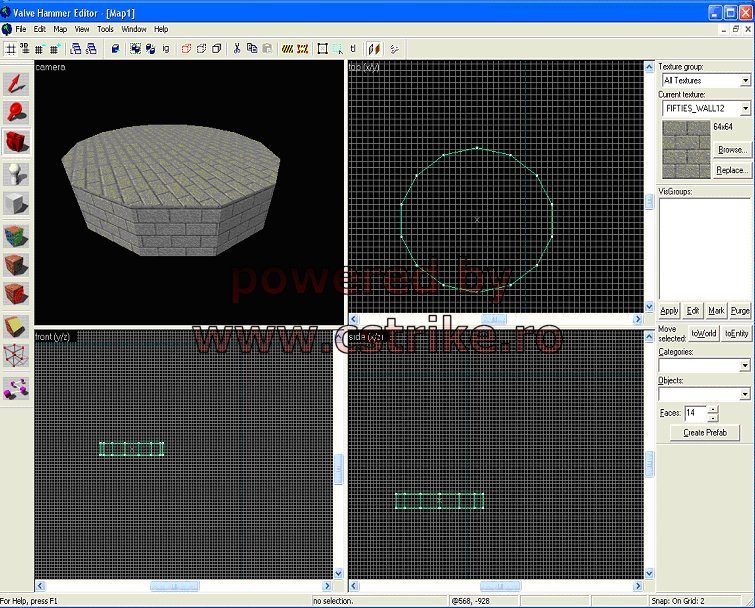
Select the brush entity,at object (in the right-down), where is "block" select "cylynder":
Click to see screenshot
After that you can create round blocks. At faces, you have to insert the number of side faces:
Click to see screenshot
How can insert a image as texture?
First of all we have to download:
1) Valve Hammer Editor(
link and
link 2 )
2) Half-Life Logo Creator(
link )
3) wally (
link )
Install the programs and make the next opperations:
» Open wally and click file » new, select half-life pakage(wad), and we have a windows like this:
Click to see screenshot
» Open Half life Logo creator
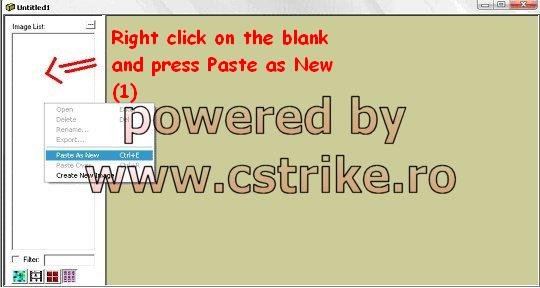
» Click open, open the image, click autosize, After that click make wad BUT DO NOT PRESS OK, go in the Half Life logo creator directory and copy the image with the name new than go in wally and press PASTE, like here:
Click to see screenshot
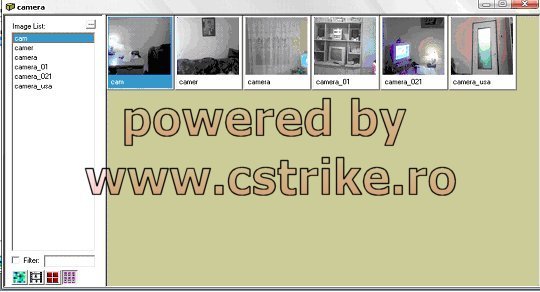
[ we use HL Logo creator because the images must be transfromed at 96*96]. After adding some images, will look like this:
Click to see screenshot
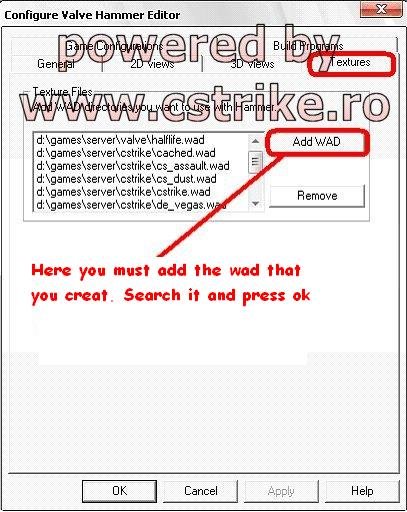
Click File » Save as and put a name. NAME.wad must be moved in games/cs/cstrike (name.wad is the wad that you named when you press save as). Start hammer and configure it like this:
Click to see screenshot
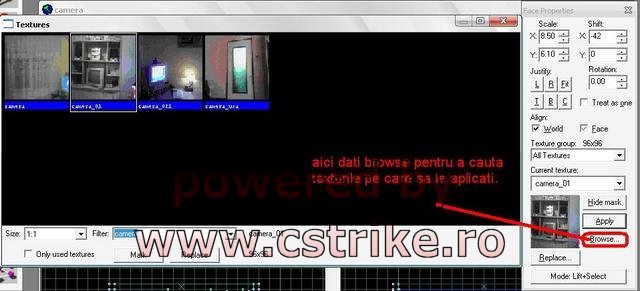
Now you can apply the textures from your .wad. will look like this:
Click to see screenshot
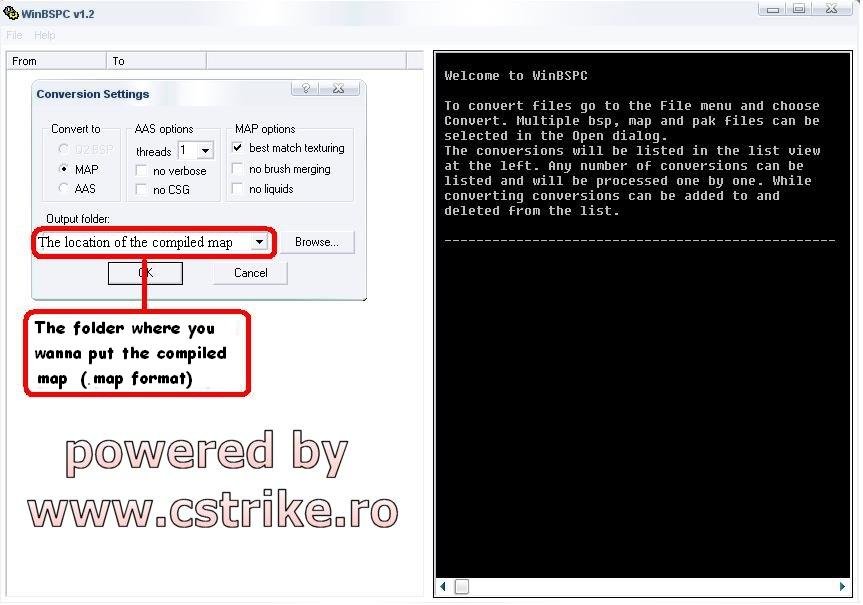
How we can edit maps?
First of all we need
winbspc12. Open the program, click file » convert, choose the map in .bsp format (from cstrike/maps) And open it:
Click to see screenshot
When look like this, means that the map is converted into .map:
Click to see screenshot  Television of Gaming
 Plugins